Writing Xamarin.Forms Apps in F#
November 4, 2015
New York, N.Y.
Judging by the copyright date on some older F# books on my shelf, I think I first started looking at this exciting functional programming language about seven years ago. F# seemed to me to be primarily what I think of as a "crunching" language most suitable for heavy math and database work. For that reason, many of the code examples in these books are console programs. In one of the books, the author needed to draw some graphics, so the F# program creating a Windows Forms window, and used that.
At that time, however, I had long transcended Windows Forms. I been coding for the Windows Presentation Foundation for several years and had recently written a book on XAML-based 3D graphics for WPF. Of course I knew why the author used Windows Forms — it's easy to create a Windows Forms window from a console app, and then go back to being a console app — but it seemed a little regressive in contrast with my personal trajectory of interests.
Moreover, I was a freelance writer at the time, and freelance writers need to be careful about what they devote their time to. Seven years ago, I didn't see myself writing a book or even a magazine article about F#, but I could easily imagine myself spending lots of non-remunerative time with the language.
Things are different now. I'm now a proud full-time employee of Xamarin, and I can use either C# or F# and .NET to write cross-platform mobile apps using the Xamarin platform.
During my time at Xamarin, I've been focusing on Xamarin.Forms, a cross-platform API that allows programmer to target the iOS, Android, and Windows and Windows Phone platforms from a single code base. Generally that code is C#, and I've been writing a book on the subject.
Over a year ago, my coworker Larry O'Brien wrote a blog entry on integrating some Xamarin.Forms into an iOS app, and I'll go even further in this blog entry in showing you how to use F# to write full-fledged Xamarin.Forms applications that target all the currently supported platforms.
This blog entry begins with excruciatingly detailed instructions on how to make an F# Xamarin.Forms app. It's actually a hybrid app because the startup code in each platform is still C# but the Xamarin.Forms code is all F#, with the layout of the user interface in XAML.
After that, I discuss a few short F# Xamarin.Forms programs, so this blog entry can also be treated as a (rather sketchy) introduction to Xamarin.Forms for people who know F#, or a (rather sketchy) introduction to F# for people who know Xamarin.Forms. I'll assume you're familiar with C# and some other XAML-based environment.
All the source code is in this GitHub repository:
https://github.com/charlespetzold/xamarin-forms-samples/tree/master/TryFSharp
This folder contains multiple copies of the same solution named TryFSharp stored in different directory names. If you deploy two or more of these to the same device, they will be regarded as the same program named TryFSharp.
It is likely that the information in this blog entry will change over time, so I'll try to keep it updated. At some point, I hope that most of the early sections will become obsolete and you'll be able to create Xamarin.Forms apps in F# with much less pain than the process I describe here. When that happens, the online Xamarin documentation will become the preferred source for this information.
Normally you can create and write Xamarin apps using either Visual Studio or Xamarin Studio. However, you cannot currently use Xamarin Studio to create an F# Portable Class Library (PCL), and that's an important component of a Xamarin.Forms application. For that reason, this discussion is limited to Visual Studio 2015. To play along, you'll need to have the Visual F# Tools installed as well as the Xamarin platform.
Creating the Xamarin.Forms Solution
In Visual Studio, invoke the File | New | Project menu command. On the left of the New Project dialog box, open up the Templates section and the Visual F# header. If you have the Xamarin platform installed you'll see options for iOS and Android apps. These templates allow you to write programs that target the native APIs of these platforms using F#.
However, you will not see a template for Xamarin.Forms. It doesn't yet exist. That's the basic problem we're trying to solve here. For that reason, you'll need to go into the Visual C# section and find the section Mobile Apps. (If you're currently running the pre-release version of Xamarin 4, this section is named Cross-Platform.) The template you want is named Blank App (Xamarin.Forms Portable).
The word Portable in this context means that your Xamarin.Forms code will be in a Portable Class Library (PCL) rather than a Shared Asset Project (SAP). We're going to be accessing an F# PCL from C# code, and that approach won't work with an SAP.
Find a location for the project and give it a name, for example TryFSharp.
What you get is a solution with four C# projects: the TryFSharp PCL that is shared by all three application platforms: FSharp.iOS, which targets the iPhone and iPad, FSharp.Droid, which targets Android phones and tablets, and FSharp.WinPhone, which targets the Windows Phone 8 Silverlight API. These three application platforms contain short startup code that calls a static Xamarin.Forms method named Forms.Init and instantiates a public class named App in the PCL. This PCL will contain the bulk of your Xamarin.Forms application.
Replacing the C# PCL with an F# PCL
The strategy here is to replace the C# PCL in the Xamarin.Forms solution with an F# PCL. From Visual Studio, you can right-click the TryFSharp project in the Solution Explorer and pick Remove. However, this doesn't delete the project from the disk. Use Windows Explorer to do that. But be sure you to pick the correct TryFSharp folder name! There are three nested TryFSharp folders: The first contains the solution (.SLN) file; the second contains the four projects, and the third is the TryFSharp PCL project folder you'll want to delete.
The next step is to replace that project with an F# PCL. Right-click the solution name in the Solution Explorer and select Add | New Project from the menu. In the New Project dialog, at the left choose Visual F# and Windows. In the center section, you'll see four items labeled Portable Library, which are for creating an F# PCL.
If there were only one Portable Library option, it would be easy. But four?
As you probably know, there are many different .NET platforms, and each uses a somewhat different subset of the .NET base class libraries. A Portable Class Library is generally shared by more than one platform — that indeed, is the primary purpose of the PCL — and for that reason the PCL must contain only the intersection of the subsets of .NET supported by each of the platforms that use it.
Which platforms a particular PCL supports is indicated by a profile number. The profile limits what .NET classes, properties, and methods you can use in the PCL. Generally the higher the number, the more platforms are supported, and hence, the smaller the .NET subset you get. (This can sometimes be frustrating, but that's the way it is.)
The four PCLs listed in the New Project dialog and supported for F# have profile numbers 7, 47, 78, and 259. These numbers are indicated in the descriptions at the right of the dialog. These profiles support the following platforms:
| Platform | 7 | 47 | 78 | 259 |
|---|---|---|---|---|
| .NET 4.5 | X | X | X | X |
| Windows Store | X | X | X | X |
| Xamarin.iOS | X | X | X | X |
| Xamarin.Android | X | X | X | X |
| Silverlight 5 | X | X | ||
| Windows Phone (Silverlight) | X | X | ||
| Windows Phone 8.1 | X |
If you experiment, you may find that you have more flexibility than the chart would indicate for choosing which PCL to use. (By contrast, Visual Studio will not allow a C# PCL to be referenced from a project type not specifically supported by the profile.) However, at some point you might try to use a .NET class or method that is included in the profile but which is not included in the actual platform, at which time a runtime error will occur.
It's best to select the proper profile for the platforms you want. If you're only going to be targetting iOS and/or Android, you can use Profile 7. To support the Windows Phone 8 Silverlight platform (which is included in a Xamarin.Forms solution by default), use Profile 78. If you're going to be adding a Windows Phone 8.1 project targetting the Windows Runtime API — which I'll be describing how to do — choose Profile 259.
Before pressing the OK button, click the Browse... button to change the location of this new project. If you want to maintain the same directory structure as the other projects in the solution, click the nested TryFSharp folder in the File Location dialog list. Give the new project the name of TryFSharp.
We now have three C# application projects for three mobile platforms, and an F# PCL that will contain our platform-independent Xamarin.Forms code. But a little more work is still required before we begin coding.
Wiring up the Projects
It's necessary for each of the application projects to contain a reference to the PCL. To do this, right-click the References section in each application project, and choose Add Reference. In the Reference Manager dialog box, choose Projects and Solution at the left. This gives you a list of all the projects in the solution. Check the box next to the TryFSharp project, which is the PCL, and then click OK.
You'll also need to install the Xamarin.Forms libraries. These are available via the NuGet Package Manager.
Right-click the solution name in the Solution Explorer. Choose Manage NuGet Packages for Solution.... This will let you install or upgrade NuGet packages globally throughout the solution. (The following description applies to Visual Studio 2015; it's a little different for Visual Studio 2013.) In the NuGet Package Manager, in the Filter dropdown, pick All. In the Search box enter Xamarin.Forms. The first item at the left should be Xamarin.Forms. That's the one you want. In the right half of the dialog you'll see that you can select the TryFSharp PCL project. That's the project you want to add the library to.
After that, you'll want to upgrade the application projects to the same version of Xamarin.Forms. Select Upgrade available from the Filter dropdown. At the left, you'll get a list of all the libraries currently in the solution that can be upgraded. In the right, you'll see what projects they apply to. Upgrade everything. When you're finished, the application projects and the PCL should all have the same version of Xamarin.Forms installed.
That completes the infrastructure. (Almost.)
Hello F# Xamarin.Forms
Now let's turn our attention to the TryFSharp PCL. By default, the template creates three files: AssemblyInfo.fs, PortableLibrary1.fs, and Script.fsx. Delete the script file and rename the PortableLibrary1.fs file to TryFSharpPage.fs. This is my personal naming convention: For my single-page Xamarin.Forms applications, I like the page class to be the same name as the project but with the word Page appended, and of course, being primarily a C# programmer, I like naming my files with the same name as the class they contain.
The TryFSharpPage.fs file will actually contain two classes. Each of the three application projects instantiates a class in the PCL named App that derives from the Xamarin.Forms Application class. In single-page applications, the App instance generally instantiates a class that derives from ContentPage and sets its MainPage property to that instance.
Because F# does not allow forward references, the TryFSharpPage class definition must precede the App class definition in TryFSharpPage.fs. The file also contains a namespace declaration and open statements indicating the namespaces (or likely namespaces) the code uses.
Here, then, is the basic do-nothing F# Xamarin.Forms application:
namespace TryFSharp
open System
open Xamarin.Forms
type TryFSharpPage() =
inherit ContentPage()
type App() =
inherit Application(MainPage = TryFSharpPage())
You can add content to the page by setting the Content property of ContentPage. Here's some code that executes in the class's constructor to set the Content property to a Label, which in Xamarin.Forms displays text, in the process initializing several properties of Label:
namespace TryFSharp
open System
open Xamarin.Forms
type TryFSharpPage() =
inherit ContentPage()
do base.Content <- Label(Text = "Hello, F# Xamarin.Forms",
HorizontalOptions = LayoutOptions.Center,
VerticalOptions = LayoutOptions.Center,
FontSize = 24.0,
TextColor = Color.Pink,
FontAttributes = FontAttributes.Italic,
Rotation = -15.0)
type App() =
inherit Application(MainPage = TryFSharpPage())
If you're new to F# and typing this in yourself, watch out for the indentation! F# generally uses indentation to indicate block structure, and you must be consistent.
The do keyword is used here to set a property. Notice that the base keyword indicates that this Content property is not defined by the current class. It's defined by ContentPage.
Let's see if we can run this. In the Solution Explorer, right-click TryFSharp.Droid and select Set as Startup Project. You should be able to deploy to an Android emulator or an actual phone attached via USB to the machine.
For running the iOS application, you'll need a Mac connected by network to the PC that you're using to run Visual Studio. See the documentation on the Xamarin web site for connecting the PC and Mac.
When trying to compile and run the Windows Phone 8 application on an emulator or real device, you'll get an error message:
Cannot resolve reference assemblies. Please check the reference assemblies. Cannot resolve dependency to assembly 'FSharp.Core, Version=3.78.4.0, Culture=neutral, PublicKeyToken=b03f5f7f11d50a3a' because it has not been preloaded. When using the ReflectionOnly APIs, dependent assemblies must be pre-loaded or loaded on demand through the ReflectionOnlyAssemblyResolve event.
Or it might refer to " FSharp.Core, Version=3.259.4.0" if the F# PCL is Profile 259.
What this really means is that the TryFSharp.WinPhone project needs a reference to the same FSharp.Core.dll file referenced by the PCL. Why a C# project needs a reference to an F# DLL, I do not know. But let's fix it.
Fixing the Windows Phone 8 Project
We need to add a reference in the Windows Phone 8 program to FSharp.Core.dll. You might think that you can right-click the References section in the TryFSharp.WinPhone project and select Add Reference, and then in the Reference Manager, select Browse at the left and then click the Browse... button and navigate to C:\Program Files (x86)\Reference Assemblies\Microsoft\FSharp\.NETCore directory and find the version of FSharp.Core corresponding to the particular profile you used for the PCL. This is where the F# PCL gets its own copy of FSharp.Core.dll.
But that doesn't work. Instead, you'll need to right-click the TryFSharp.WinPhone project name and select Manage NuGet Packages.... In the NuGet Package Manager, set the Filter for All and in the Search box enter FSharp.Core. The first item should be FSharp.Core, with a description "FSharp.Core for F# 4.0." Install that into the Windows Phone project.
But wait: There's more!
The version of FSharp.Core.dll that the NuGet Manager installs in the Windows Phone 8 project is 3.78.4.0, which corresponds to a Profile 78. If you've actually used Profile 259 for the PCL, you now have an inconsistency, and it won't work. You'll need to edit the TryFSharp.WinPhone project file.
Interestingly, the NuGet Package Manager has downloaded several versions of FSharp.Core.dll. If you'd like to see where they're stored, go to the solution directory — the same directory with the TryFSharp.sln file — and you'll see a directory named packages containing the NuGet downloads. In the subdirectory FSharp.Core.4.0.0.1/lib you'll see seven directories. Three of these correspond to the following profiles:
- portable-net45+netcore45 is Profile 7.
- portable-net45+netcore45+wp8 is Profile 78.
- portable-net45+netcore45+wpa81+wp8 is Profile 259.
Now you just need to reference the right one in the Windows Phone 8 project file.
Let's edit that project file. Right-click the TryFSharp.WinPhone project in the Solution Explorer. Pick Unload project. Then right-click the project name again and pick Edit TryFSharp.WinPhone.csproj. Find the Reference tag that refers to FSharp.Core and the following HintPath tag that references the directory. In the Reference tag change the version to "3.259.4.0". In the HintPath tag change the directory to "portable-net45+netcore45+wpa81+wp8".
Now right-click the project name again and pick Reload Project. You'll have an opportunity to save the edited version of the project file. Do so.
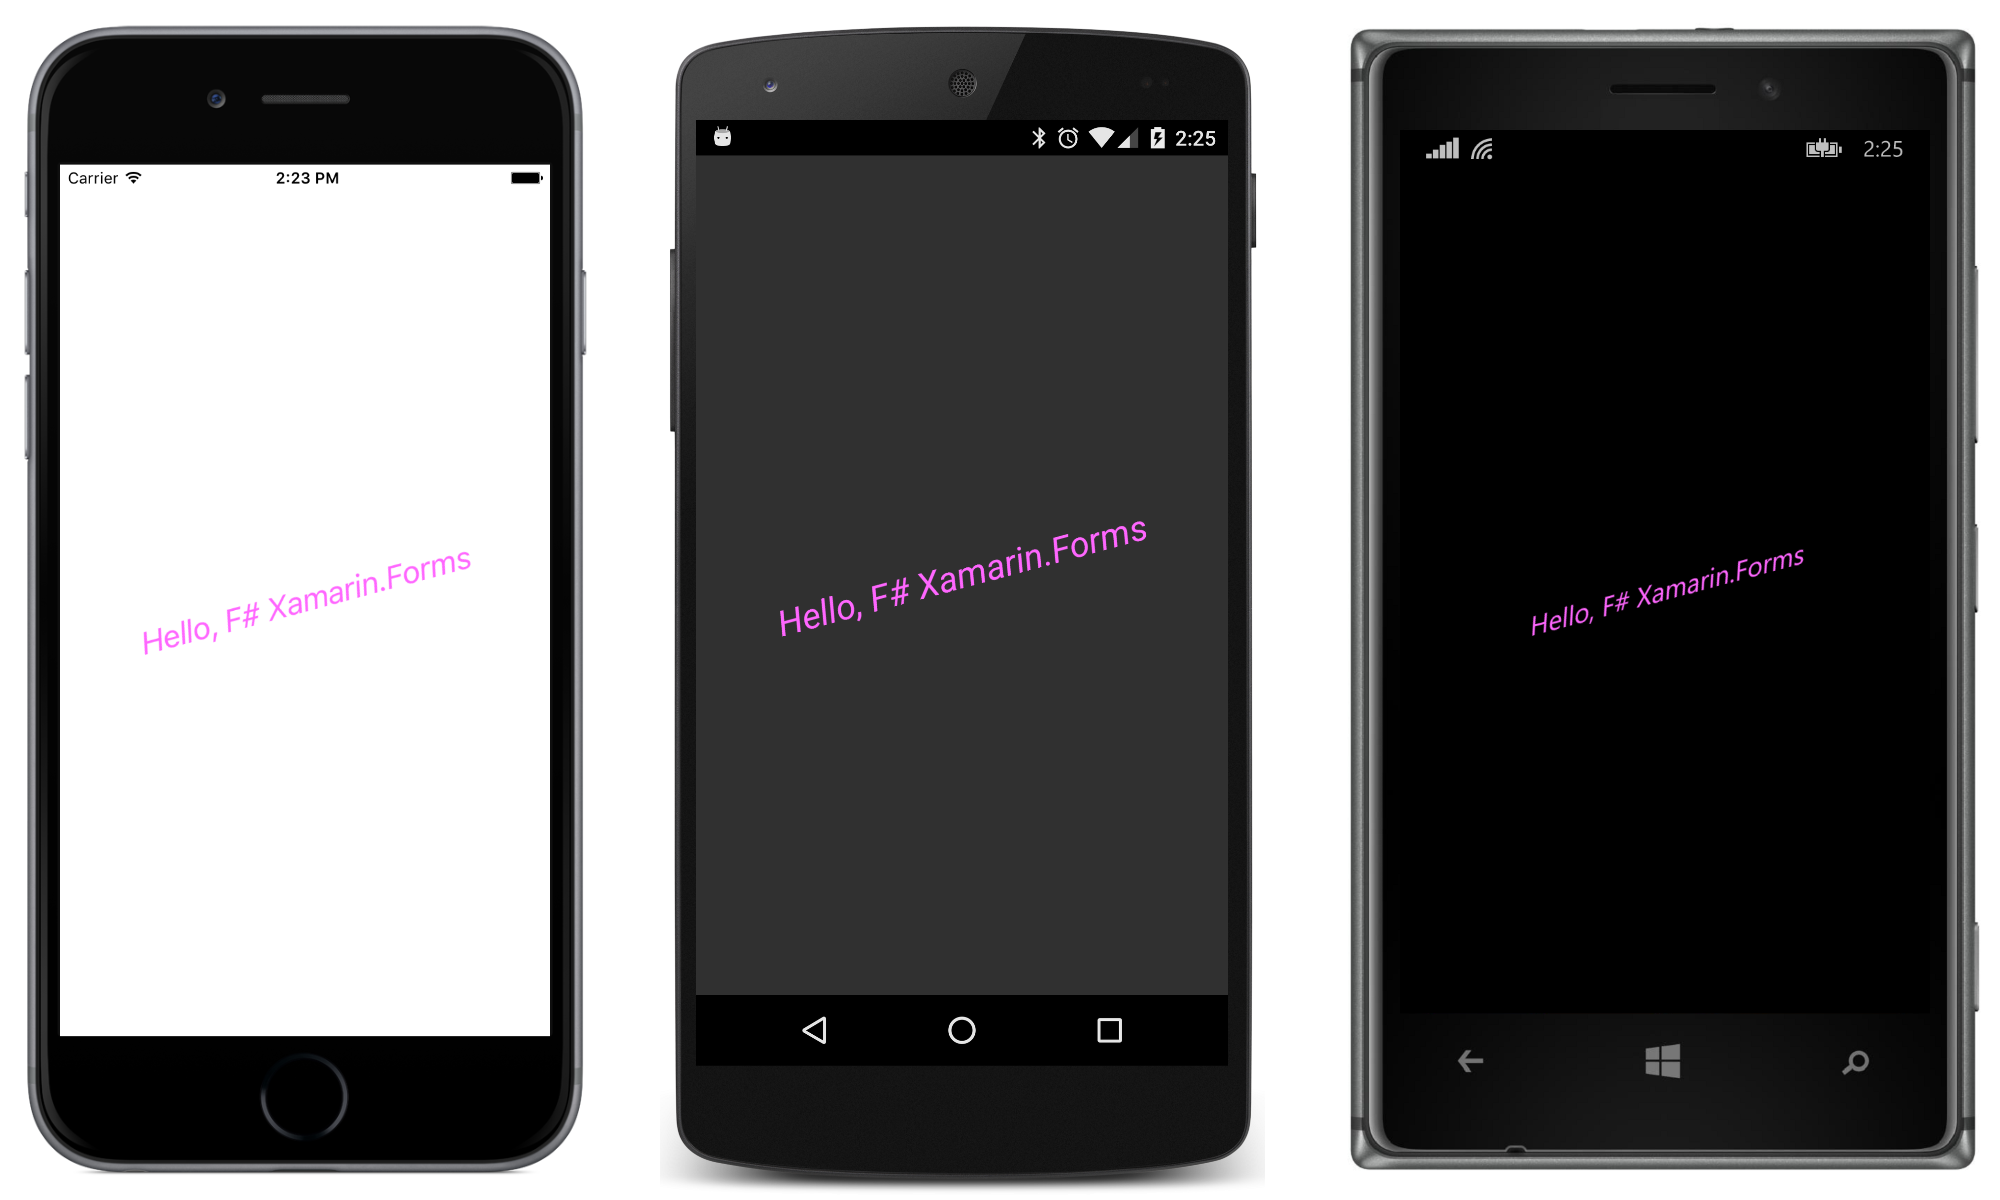
Now you should be able to run the program on a Windows Phone 8 device or emulator. Here is the TryFSharp project running on iOS, Android, and Windows Phone 8:
The Visual Studio solution for this program is in the FSharpHello directory of the GibHub repository indicated earlier. The NuGet libraries aren't stored with the source code on GitHub. When you clone the repository, after loading the solution into Visual Studio, you'll need to restore the NuGet packages. Right-click the solution name in the Solution Explorer, pick Manage NuGet Packages for Solution..., and you should get a notification at the top of the NuGet Package Manager to restore the packages. Do so. After that, you can optionally upgrade to later versions of Xamarin.Forms if they exist.
Optional: Add Windows Runtime Projects
You can also add two Windows Runtime applications projects to the solution for targetting Windows Phone 8.1 and Windows 8.1. It's easiest if you do set up these two projects at the same time because they are very similar.
In the Solution Explorer, right-click the solution name, and pick Add | New Project. In the New Project dialog box, at the left navigate to Visual C#, Windows, and Windows 8. Under the Windows 8 header, select Windows and in the central section select Blank App (Windows 8.1). Click the Browse... button and in the Project Location dialog click the TryFSharp directory. This puts the new project at the same location as the other projects. Back in the New Project dialog name it TryFSharp.WinApp.
Do this again, but this time pick Windows Phone at the left, and Blank App (Windows Phone) in the central section. Change the folder location as before and name it TryFSharp.WinPhone81.
In the Solution Explorer these two projects should be identified as "Windows 8.1" and "Windows Phone 8.1."
These two new projects need references to the TryFSharp PCL. Right-click References in each, choose Add Reference, and in the Reference Manager dialog, pick Solution at the left and check the TryFSharp project.
These two new projects also need the Xamarin.Forms libraries. The easiest way to do this is to invoke the NuGet Package Manager for the solution. In the Filter dropdown select All, and search for Xamarin.Forms. Install it for the two projects.
Now both projects need a call to Forms.Init. Open the App.xaml.cs file in the two projects. Look for the statement
if (e.PreviousExecutionState == ApplicationExecutionState.Terminated)
Right before that statement add the line:
Xamarin.Forms.Forms.Init(e);
Both pages also need to derive from a special Xamarin.Forms page. In the root element of the MainPage.xaml files of both projects, add a new XML namespace declaration (perhaps right after the xmlns:x declaration):
xmlns:forms="using:Xamarin.Forms.Platform.WinRT"
In the Windows 8.1 project, change the root tag from Page to forms:WindowsPage. In the Windows Phone 8.1 project, change the root tag to forms:WindowsPhonePage.
Now go into the MainPage.xaml.cs file of the two projects. In the Windows 8.1 project, change the base class of MainPage from Page to Xamarin.Forms.Platform.WinRT.WindowsPage. In the Windows Phone 8.1 project, change it to Xamarin.Forms.Platform.WinRT.WindowsPhonePage.
In the last line of the MainPage constructor for each project, add the line:
LoadApplication(new TryFSharp.App());
That instantiates the App class in the PCL, which then instantiates the application's home page.
If you originally created the F# PCL using Profile 78, you should change that to Profile 259: Right-click the TryFSharp project in the Solution Explorer and select Unload Project. Right-click it again for Edit TryFSharp.fsproj. Towards the top of the file, change the content of the TargetFrameworkProfile tag to "Profile259" and change the content of the TargetFSharpCoreVersion tag to "3.259.4.0". Right-click the project name again and Reload Project and save it.
Now the Windows Phone 8 project doesn't work because it's referencing FSharp.Core for Profile 78. Go back to the section "Fixing the Windows Phone 8 Project" to learn how to change the Windows Phone 8 project from Profile 78 to Profile 259.
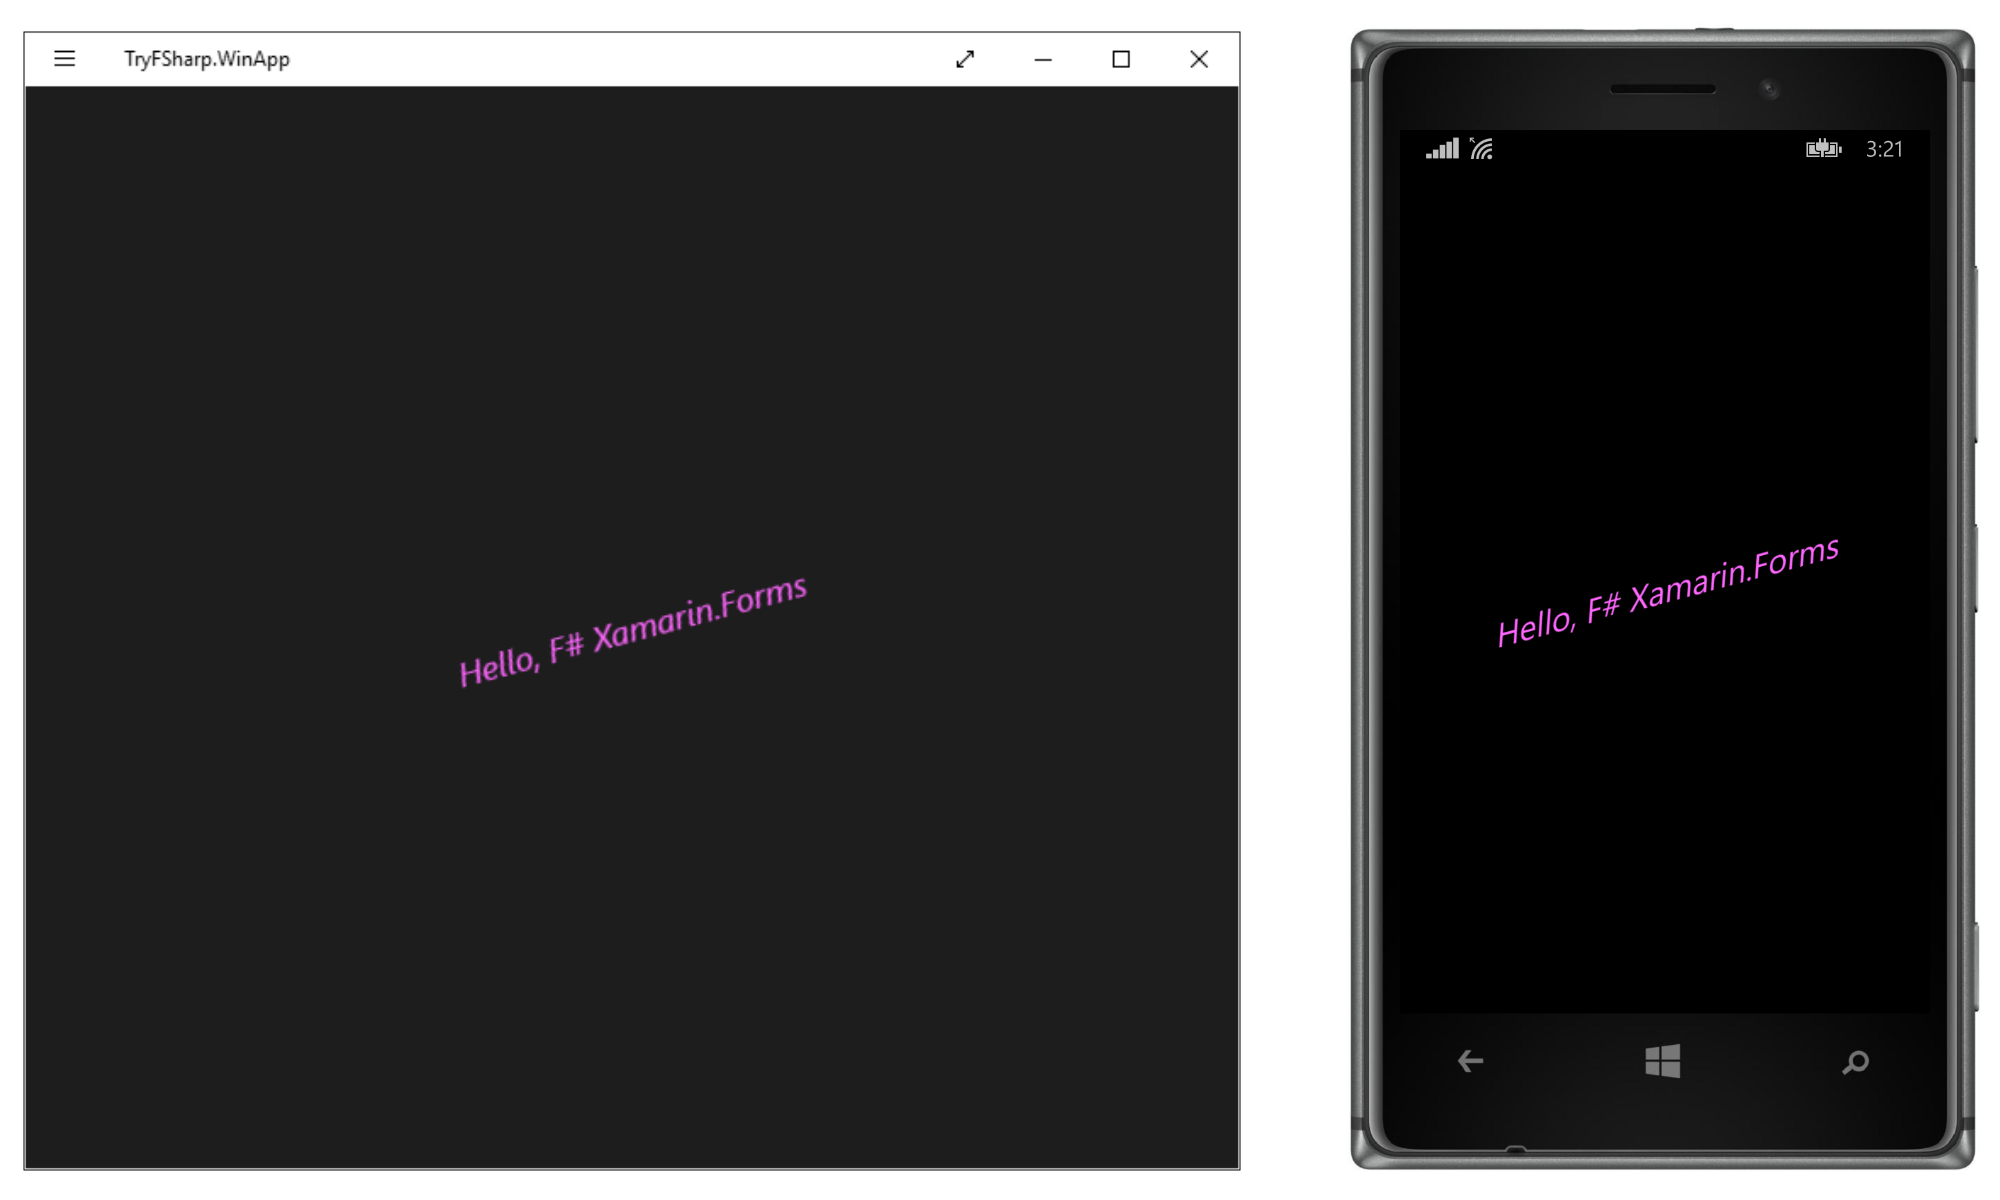
You should now be able to select these two projects as startup projects and deploy to Windows and Windows Phone 8.1. The following screenshot shows the Windows project running in a window under Windows 10, and the Windows 8.1 project running on a phone:
Adding a XAML File
Normally you define the user interface of your Xamarin.Forms application in a XAML file. However, XAML files are not supported in F# projects.
But this is not to say that you can't include a XAML file in your F# PCL. Eventually there will be an F# type provider that will allow you to use XAML files. For now, however, we can fudge it.
Right-click the TryFSharp project name in the Solution Explorer and select Add | New Item. Find the XML File item. But name this XML file TryFSharpPage.xaml, the same name as the file with the page class but with a .xaml extension.
Now right-click this XAML file and select Properties. In the Properties box, set the Build Action to EmbeddedResource. This causes the XAML file to be embedded into the executable where it can be extracted at runtime.
There will be no compile-time processing of this XAML file. Nor will you get any Intellisense help for typing it in. Any errors will only be exposed at run-time when the XAML file is loaded and parsed.
The following XAML file contains Xamarin.Forms elements. It defines a class named TryFSharpPage in the TryFSharp namespace that derives from ContentPage. The Content property of the page is implicitly set to a StackLayout which organizes its children in a vertical stack (by default). The page consists of an Entry for entering a line of text, a Button, and a ListView which displays a scrollable list of objects:
<ContentPage xmlns="http://xamarin.com/schemas/2014/forms"
xmlns:x="http://schemas.microsoft.com/winfx/2009/xaml"
x:Class="TryFSharp.TryFSharpPage">
<ContentPage.Padding>
<OnPlatform x:TypeArguments="Thickness"
iOS="0, 20, 0, 0" />
</ContentPage.Padding>
<StackLayout>
<Entry x:Name="entry"
Placeholder="Enter number"
Keyboard="Numeric" />
<Button Text="Calculate"
HorizontalOptions="Center"
Clicked="OnCalculateButtonClicked" />
<ListView x:Name="listView"
VerticalOptions="FillAndExpand" />
</StackLayout>
</ContentPage>
The Padding setting on the ContentPage uses the OnPlatform element to set a value specifically for iOS. Without this padding, the content a single-page iOS app overlaps the status bar at the top of the screen.
The x:Name attributes allow referencing these objects in the XAML file from the F# code file. OnCalculateButtonClicked is an event handler for the button's Clicked event. This must be a method in the code file. These are the two common ways that code and markup interact.
As I said, there is no compile-time processing of this XAML file. The file is simply embedded in the executable where it can be extracted and parsed at runtime.
To the code file you'll need access to classes in the Xamarin.Forms.Xaml namespace:
open Xamarin.Forms.Xaml
To the body of the TryFSharpPage class definition in TryFSharp.fs, add a call to the LoadFromXaml method to load the XAML file, parse it, instantiate the elements, and add them to the page object:
let _ = base.LoadFromXaml(typeof<TryFSharpPage>)
The underscore indicates that we'd like to ignore the return value.
Next, get references to the two objects in the XAML file that have x:Name attributes:
let entry = base.FindByName<Entry>("entry")
let listView = base.FindByName<ListView>("listView")
The LoadFromXaml and FindByName calls will eventually be replaced by an F# type provider, but for now they're not too bad to be able to use a XAML file to define your user interface in an F# program.
The code file also needs an event handler for the Clicked event of the Button. This needs to be a member of the page class, and the arguments need to explicitly specified:
member this.OnCalculateButtonClicked(sender : Object, args : EventArgs) =
Let's code a prime-number generator, and let's use a common sieve algorithm but written in an "F#-ish" way, i.e., without any explicit loops. With a sieve algorithm generally you start with all the integers from 2 through the maximum number for which you want to calculate the primes. Then start multiplying these numbers by each other. These are non-primes. Strike them from the collection. What's left is the primes.
First, use the Int32.Parse method to convert the text typed into the Entry to an integer:
member this.OnCalculateButtonClicked(sender : Object, args : EventArgs) =
let n = Int32.Parse(entry.Text)
In a real program, you'd use TryParse for error processing, but this is just a simple demo.
Now calculate a number that is about half of that number. For example, if n is 200, then m will be 98:
let m = (n + 1) / 2 - 2
Now let's make an array that consists of all the numbers from 2 through (m plus 2) multiplied by each other. F# allows you to create and initialize an array using the Array.init function, which requires the number of elements in the array (in this case m squared) and a function that converts each index (from 0 through m squared minus 1) to the element of the array:
Array.init(m * m) (fun index -> (index % m + 2) * (index / m + 2))
That array contains a bunch of non-primes. It has many more non-primes than we need, and there are lots of duplicates. But optimizing it would take a bit more work.
Now let's convert that array into another F# collection type, which is a set. This uses the F# piping operator (|>), which shovels a collection output from one function into another function:
|> Set.ofArray
F# supports several collecton types, but the set is possibly the most obscure. One of the characteristics of the Set is that it only contains unique members The function Set.ofArray function that converts an array to a set obviously does a lot of work behind the scenes to eliminate duplicate members.
The reason I converted to a set is to use a function that's peculiar to the Set. The Set.difference function compares two sets and yields all the elements in one set that are not in the other. Let's use this with another array converted into another set of all the numbers from 2 through n:
|> Set.difference (Set.ofArray([| 2..n |]))
The result is all the primes from 2 through n.
How do we get that set into the ListView in the XAML file? The ListView has an ItemsSource property that you can set to any collection that implements the .NET IEnumerable interface. The F# Set implements IEnumerable, so we can set ItemsSource to the calculation of this collection:
do listView.ItemsSource <-
Array.init(m * m) (fun index -> (index % m + 2) * (index / m + 2))
|> Set.ofArray
|> Set.difference (Set.ofArray([| 2..n |]))
Here's the complete page class:
namespace TryFSharp
open System
open Xamarin.Forms
open Xamarin.Forms.Xaml
type TryFSharpPage() =
inherit ContentPage()
let _ = base.LoadFromXaml(typeof<TryFSharpPage>)
let entry = base.FindByName<Entry>("entry")
let listView = base.FindByName<ListView>("listView")
member this.OnCalculateButtonClicked(sender : Object, args : EventArgs) =
let n = Int32.Parse(entry.Text)
let m = (n + 1) / 2 - 2
do listView.ItemsSource <-
Array.init(m * m) (fun index -> (index % m + 2) * (index / m + 2))
|> Set.ofArray
|> Set.difference (Set.ofArray([| 2..n |]))
type App() =
inherit Application(MainPage = TryFSharpPage())
Run it, type a reasonably small number into the Entry, and tap the Button:

This version of the program can be found in the FSharpPrimes directory.
Creating Runtime Bitmaps
One of the current drawbacks of Xamarin.Forms is that it doesn't have a built-in graphics system. It supports a control to display Open GL graphics, but currently that only works on iOS and Android, and it doesn't provide an easy way to do simple basic 2D graphics.
However, Xamarin.Forms does support an Image element to display bitmaps. These bitmaps can come from the web, or they can be embedded as resources in the PCL, or they can be embedded in the individual platform projects.
Xamarin.Forms also supports a static method that creates a bitmap from a .NET Stream object such as a file stream, or a memory stream. The use of a memory stream suggests that if you can generate the contents of a bitmap file at runtime, you can also generate a bitmap at runtime.
When we think of bitmap files these days, we generally think of JPEG and PNG. But generating a JPEG or PNG at runtime really makes no sense when you realize that all the application platforms supported by Xamarin.Forms support the BMP format as well, and it's fairly easy to generate an uncompressed BMP file in memory.
Here is an F# module named Bmp that contains a single function named Create that creates a 32-bit-per-pixel BMP file in memory and returns a Stream object. Modules are one of the code organizational features in F#, and can contain values and functions as well as types.
This Create function has three arguments: a pixel width and height of the bitmap, and a function named getPixel with two integer arguments that returns a Xamarin.Forms Color value. The bulk of the function consists of Write calls on a BinaryWriter object that writes the BMP header information to both the MemoryStream and the byte buffer. These Write calls return no values, so they must be preceded by a do keyword, but a single do can apply to a whole series of calls:
module Bmp
open System
open System.IO
open System.Text
open Xamarin.Forms
let Create (width : int) (height : int) (getPixel : int -> int -> Color) =
let headerSize = 54
let numPixels = width * height
let numPixelBytes = 4 * numPixels
let fileSize = headerSize + numPixelBytes
let buffer : byte array = Array.zeroCreate fileSize
let memoryStream = new MemoryStream(buffer)
let writer = new BinaryWriter(memoryStream, Encoding.UTF8)
// Construct BMP header (14 bytes)
do writer.Write 'B' // Signature
writer.Write 'M'
writer.Write fileSize // File size
writer.Write (int16 0) // Reserved
writer.Write (int16 0) // Reserved
writer.Write headerSize // Offset to pixels
// Construct BitmapInfoHeader (40 bytes)
do writer.Write 40 // Header size
writer.Write width // Pixel width
writer.Write -height // Pixel height
writer.Write (int16 1) // Planes
writer.Write (int16 32) // Bits per pixel
writer.Write 0 // Compression
writer.Write numPixelBytes // Image size in bytes
writer.Write 0 // X pixels per meter
writer.Write 0 // y pixels per meter
writer.Write 0 // Number colors in color table
writer.Write 0 // Important color names
for row = 0 to height - 1 do
for col = 0 to width - 1 do
let color = getPixel row col
let index = headerSize + 4 * (row * width + col)
do buffer.[index + 0] <- byte (255.0 * color.B)
buffer.[index + 1] <- byte (255.0 * color.G)
buffer.[index + 2] <- byte (255.0 * color.R)
buffer.[index + 3] <- byte (255.0 * color.A)
do memoryStream.Position <- int64 0
memoryStream :> Stream
Towards the end are nested loops that call that supplied getPixel function for every pixel in the bitmap, breaking the returned Color value into byte components. At the very end of the function, the MemoryStream is cast to Stream that is then returned from the function.
When a new code file such as this is added to a project, it must appear in the project file list before any other code that references it, which in this case is FSharpPage.fs file. You can shift a file's position in the project list by right-clicking the file and choosing the Move Up and Move Down commands. These commands have keyboard shortcuts using Alt with the arrow up and down keys.
Let's modify the XAML file to get rid of the Entry and ListView and add an Image element:
<ContentPage xmlns="http://xamarin.com/schemas/2014/forms"
xmlns:x="http://schemas.microsoft.com/winfx/2009/xaml"
x:Class="TryFSharp.TryFSharpPage">
<ContentPage.Padding>
<OnPlatform x:TypeArguments="Thickness"
iOS="0, 20, 0, 0" />
</ContentPage.Padding>
<StackLayout>
<Image x:Name="image"
VerticalOptions="FillAndExpand" />
<Button Text="Calculate"
HorizontalOptions="Center"
Clicked="OnCalculateButtonClicked" />
</StackLayout>
</ContentPage>
In the code-behind file, let's get a reference to that Image element:
let image = base.FindByName<Image>("image")
Many phones these days have high-definition screens, so a dimension of 1000 pixels isn't unreasonable for a bitmap in a phone application. Let's define two values for the number of pixel rows and columns in the bitmap:
let rows = 1000
let cols = 1000
F# is a strongly typed language, but the compiler often succeeds in determining types without the programmer needing to specify them. These are assumed to be integers.
The OnCalculateButtonClicked function calls Bmp.Create with these rows and cols values and must supply a function whose arguments are a row and column, and which returns a Color value. Let's make red range from 0 at the top to 1.0 on the bottom, and blue range from 0 at the left to 1.0 at the right.
let stream = Bmp.Create rows cols (fun row col ->
let red = float row / float rows
let blue = float col / float cols
Color.FromRgb(red, 0.0, blue)
)
The final step in the Clicked event handler is to pass that Stream object to the Xamarin.Forms ImageSource.FromStream method. Interestingly enough, the argument to this method is not a Stream object but a function that returns a Stream. The resultant ImageSource can then be set to the Source property of the Image element. Here's the complete code listing:
namespace TryFSharp
open System
open Xamarin.Forms
open Xamarin.Forms.Xaml
type TryFSharpPage() =
inherit ContentPage()
let _ = base.LoadFromXaml(typeof<TryFSharpPage>)
let image = base.FindByName<Image>("image")
let rows = 1000
let cols = 1000
member this.OnCalculateButtonClicked(sender : Object, args : EventArgs) =
let stream = Bmp.Create rows cols (fun row col ->
let red = float row / float rows
let blue = float col / float cols
Color.FromRgb(red, 0.0, blue)
)
do image.Source <- ImageSource.FromStream(fun _ -> stream)
type App() =
inherit Application(MainPage = TryFSharpPage())
Pressing the button creates bitmap with a gradient of sorts:
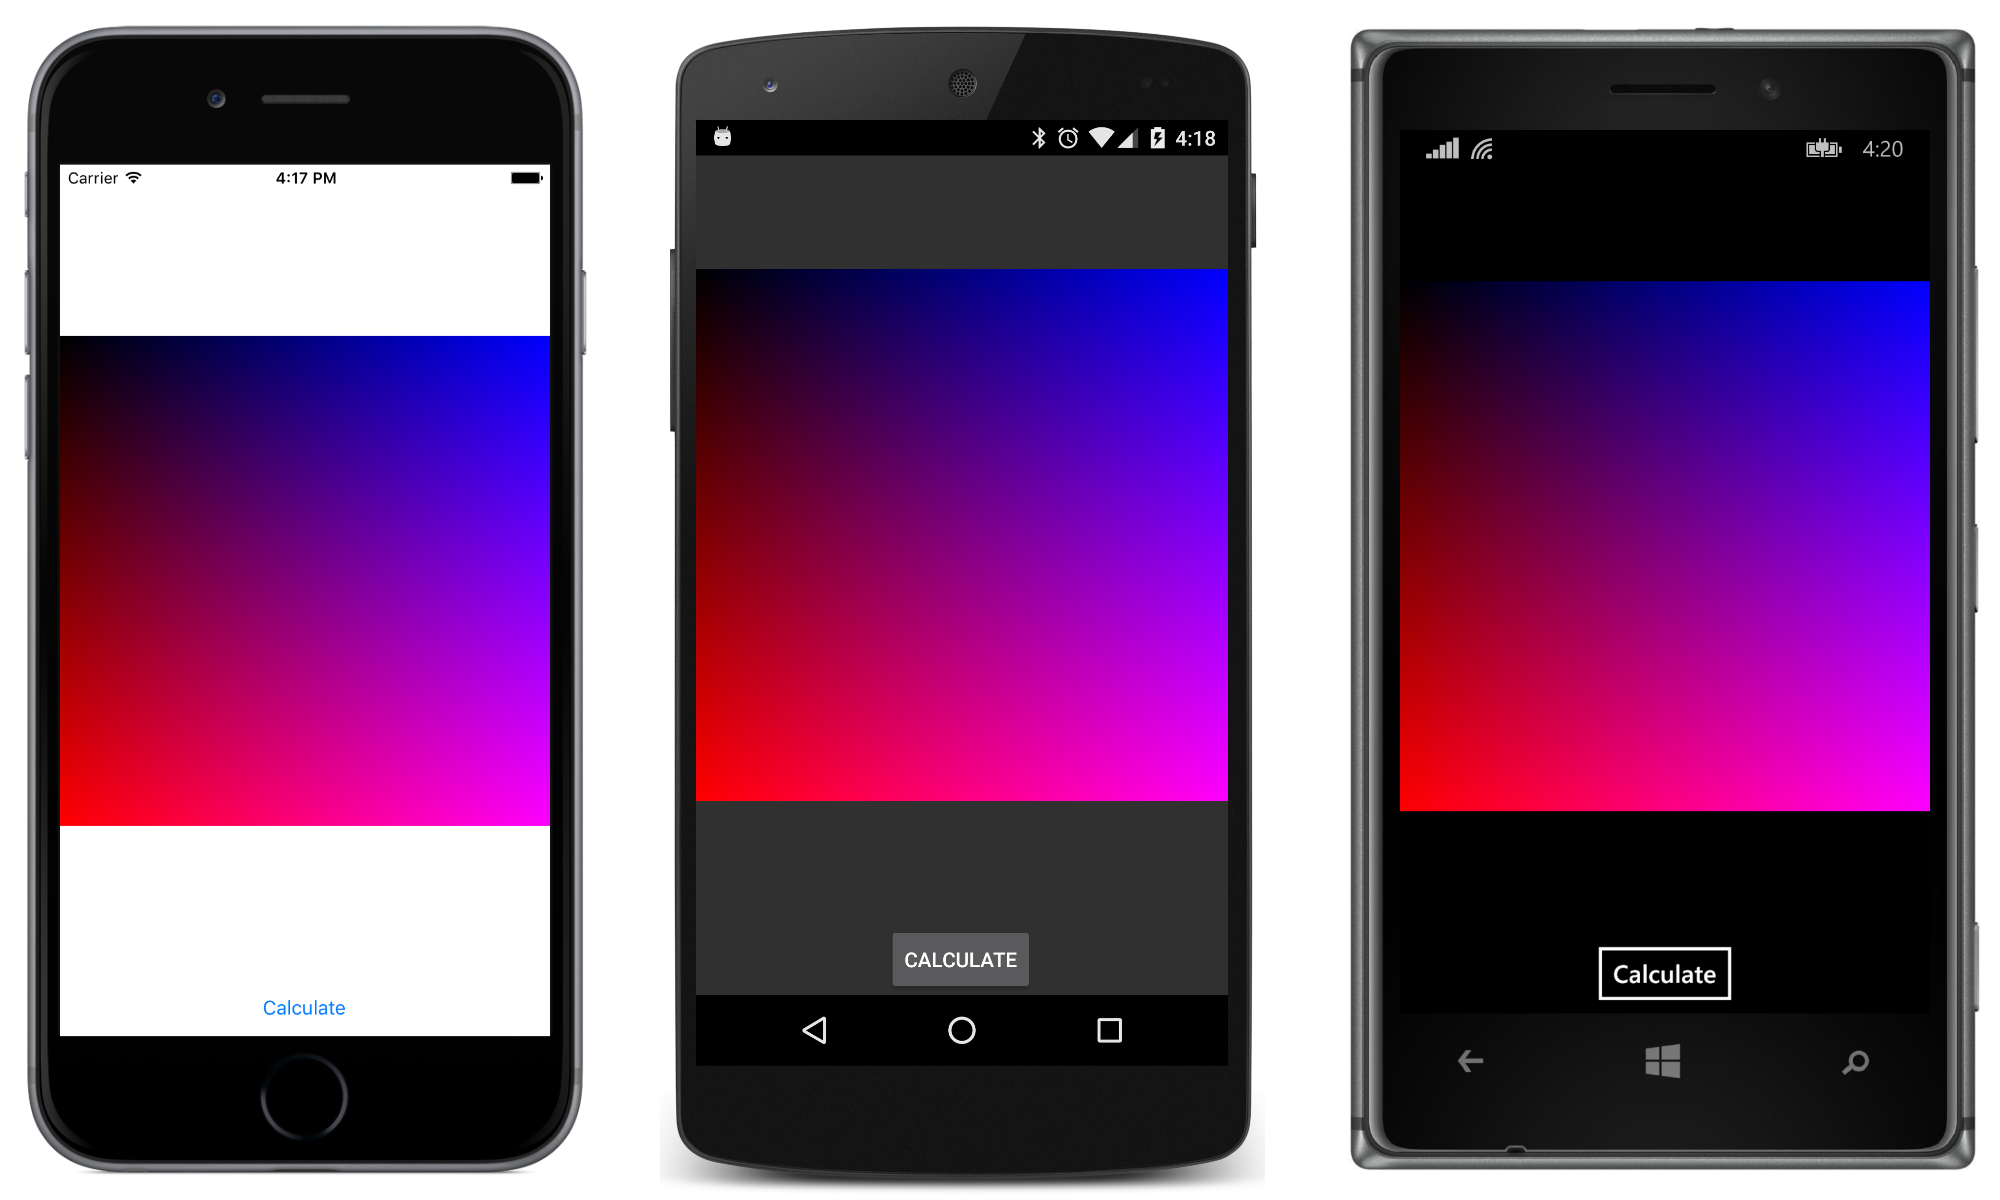
The layout defined in the XAML file assumes that the screen is in portrait mode. If you run the program in landscape mode, the created bitmap will probably push the Button off the bottom of the screen. A somewhat more sophisticated layout (involving some code as well) is required to accomodate landscape mode in this program.
The source code can be found in the solution with the folder name FSharpGradient.
The Basic Mandelbrot
Let's try a somewhat more challenging bitmap image — the Mandelbrot set.
The Mandelbrot set is a fractal image studied by mathematician Benoit Mandelbrot. It is graphed on the complex plane, real numbers forming the horizontal axis and imaginary number on the vertical axis. Any point in this plane is a complex number. Square it. Add it to the original number. Square it again, and repeat.
If this sequence diverges — if the magnitude of the complex numbers gets larger and larger — then the point is not a member of the Mandelbrot set. Color it white. If the magnitude doesn't get larger and larger, then it is a member of the Mandelbrot set and color it black.
How do we know if the sequence is converging or not? It is known that if the magnitude of the complex number ever gets to 2, then the sequence will diverge and that point is not a member of the Mandelbrot set. But in the general case, you can never tell for sure if a point that does not appear to be diverging is a member of the Mandelbrot set. Who knows? A few more iterations, and the magnitude might exceed 2. Generally you'll just set a maximum number of iterations and if it hasn't diverged when you reach the end, just assume that it's not diverging. If the results don't "look right" (based on experience), pick a higher number of iterations.
It's convenient to have a Complex data type for the Mandelbrot calculation. If you're not targetting any Windows or Windows Phone platforms, you can use a Profile 7 PCL and you have access to the .NET Complex structure in the System.Numerics namespace. But otherwise you need to use something else.
Here is a barebones Complex structure that will be suitable for our purposes (but just barely) with a namespace name that doesn't try to pretend it's anything else:
namespace Demo.Numerics
open System
[<Struct>]
type Complex(real : float, imaginary : float) =
member this.Real = real
member this.Imaginary = imaginary
static member (+) (c1 : Complex, c2 : Complex) =
new Complex(c1.Real + c2.Real, c1.Imaginary + c2.Imaginary)
static member (*) (c1 : Complex, c2 : Complex) =
new Complex(c1.Real * c2.Real - c1.Imaginary * c2.Imaginary,
c1.Real * c2.Imaginary + c1.Imaginary * c2.Real)
member this.Magnitude =
sqrt(this.Real * this.Real + this.Imaginary * this.Imaginary)
member private this.Connector =
if Math.Sign(this.Imaginary) > 0 then '+' else '\u2013'
override this.ToString() =
sprintf "%f %c %f\u2148" this.Real this.Connector this.Imaginary
member this.ToString(fmt : string) =
sprintf "%s %c %s\u2148" (this.Real.ToString(fmt))
this.Connector
(this.Imaginary.ToString(fmt))
It supports addition and subtraction and has a Magnitude property. This file needs to be added to the TryFSharp project and moved in the file list to precede the TryFSharpPage.fs file.
The page class already has let statements for the number of rows and columns in the bitmap. But the bitmap has another dimension in terms of complex numbers. The center of the bitmap corresponds to a complex number and the width and height correspond to a range of real numbers and imaginary numbers, respectively:
let center = Complex(-0.75, 0.0)
let width = 2.5
let height = 2.5
The F# compiler knows the types of these values without the type being explicitly declared.
Now let's write a couple functions that convert a pixel column and row to the real and imaginary parts of a complex number. Short functions in F# are easy to define. ColToX and RowToY are the function names; col and row are the arguments, and based on the bodies, the functions obviously return float values.
let ColToX col = center.Real - width / 2.0 +
float(col) * width / float(cols)
let RowToY row = center.Imaginary - height / 2.0 +
float(row) * height / float(rows)
There is no implicit casting in F#, which is why the col and row arguments and the cols and rows values need to be cast to float values, and why the floating point literal of 2.0 needs a decimal point to indicate the type.
Now we need an IsMandelbrot function. Give it a complex number and a number of iterations and it returns true if the complex number is a member of the Mandelbrot set and false otherwise:
let IsMandelbrot c iterations =
let mutable z = new Complex()
let mutable rep = 0
while rep < iterations && z.Magnitude < 2.0 do
z <- z * z + c
rep <- rep + 1
rep = iterations
This is how such a function would normally be written in a procedural language like C#. It contains a loop that accumulates a value and decrements a count. However, in F#, values are immutable by default, and to define a mutable value (known in other languages as a variable) it is necessary to use the mutable keyword. This is frowned upon by F# purists and you'll later see how to replace IsMandelbrot with a version that does not use any mutable values.
The return value of a function is indicated by the last line in the function: rep = iterations. That equal sign is not an assignment operator; it's an equality operator. The IsMandelbrot function returns a Boolean value that is true if rep equals iterations and false otherwise.
Let's make sure that the Button isn't clicked again while the Clicked handler is currently calculating a value. The sender argument can be cast to a Button object at runtime, and then the IsEnabled property can be set to false at the beginning of the function and set back to true at the end:
member this.OnCalculateButtonClicked(sender : Object, args : EventArgs) =
let button = sender :?> Button
do button.IsEnabled <- false
...
do button.IsEnabled <- true
Between those settings of IsEnabled, the function passed to the Bmp.Create forms a complex number from the row and col arguments and returns Color.Black if IsMandelbrot returns true and Color.White otherwise. Here's the complete code listing:
namespace TryFSharp
open System
open System.Numerics
open Xamarin.Forms
open Xamarin.Forms.Xaml
open Demo.Numerics
type TryFSharpPage() =
inherit ContentPage()
let _ = base.LoadFromXaml(typeof<TryFSharpPage>)
let image = base.FindByName<Image>("image")
let rows = 1000
let cols = 1000
let center = Complex(-0.75, 0.0)
let width = 2.5
let height = 2.5
let ColToX col = center.Real - width / 2.0 +
float(col) * width / float(cols)
let RowToY row = center.Imaginary - height / 2.0 +
float(row) * height / float(rows)
let IsMandelbrot c iterations =
let mutable z = new Complex()
let mutable rep = 0
while rep < iterations && z.Magnitude < 2.0 do
z <- z * z + c
rep <- rep + 1
rep = iterations
member this.OnCalculateButtonClicked(sender : Object, args : EventArgs) =
let button = sender :?> Button
do button.IsEnabled <- false
let stream = Bmp.Create rows cols (fun row col ->
let x = ColToX col
let y = RowToY row
let c = Complex(x, y)
if IsMandelbrot c 100 then Color.Black else Color.White
)
do image.Source <- ImageSource.FromStream(fun _ -> stream)
do button.IsEnabled <- true
type App() =
inherit Application(MainPage = TryFSharpPage())
Now let's run it:
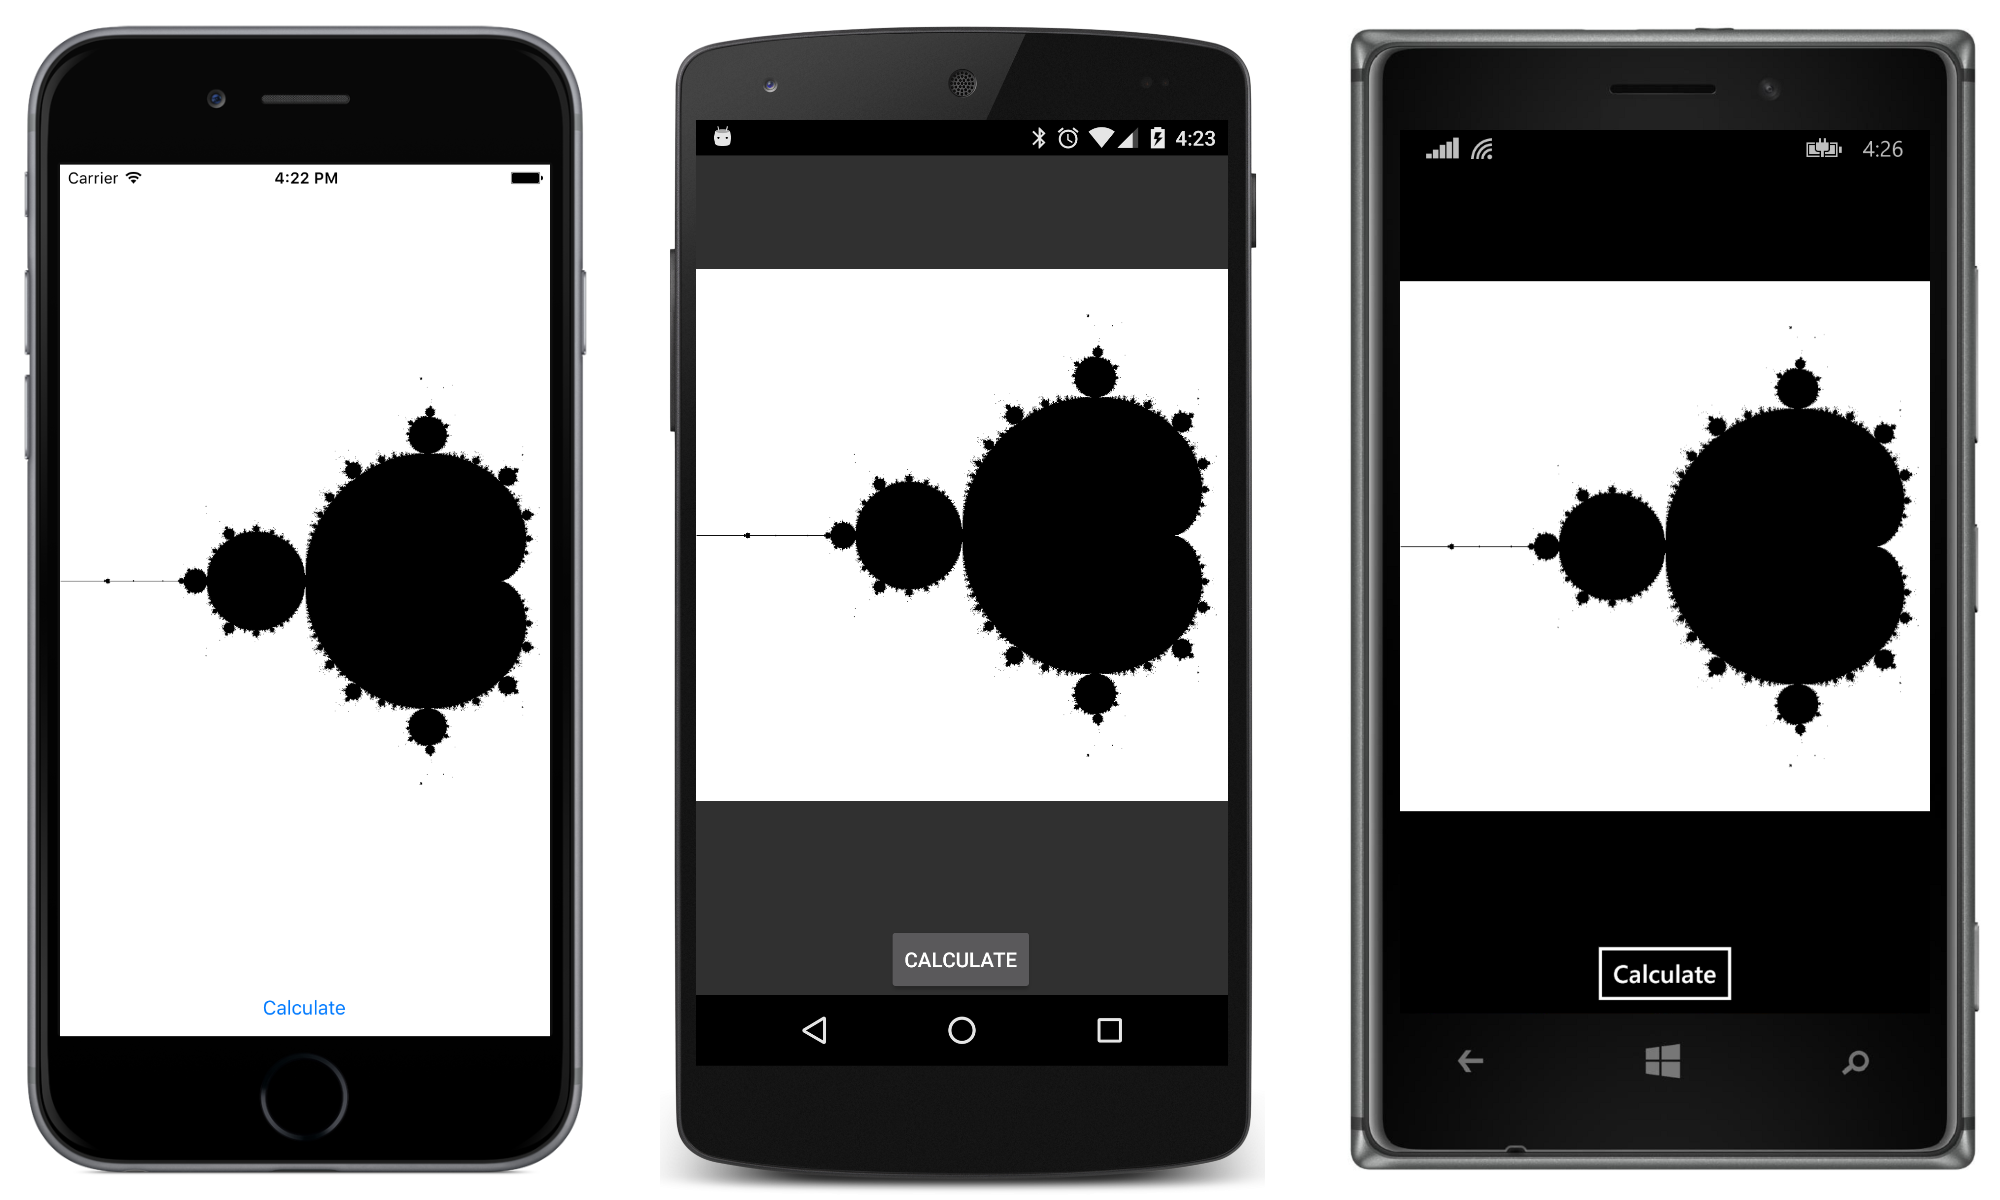
It seems to be working! The source code can be found in the solution with the folder name FSharpMandelbrot.
When you click the button, this program requires some time for the 1,000,000 pixels to be subjected to the IsMandelbrot function. On Android and Windows Phone, you'll notice that the Button is not even disabled during that time. (It is disabled on iOS.) The problem is that we're blocking the user-interface thread, and the Android and Windows Phone platforms don't even get a chance to update their user interfaces while the calculation is in progress.
Blocking the UI thread is considered very bad behavior these days, and the problem needs to be fixed.
Making it Async
We know what we need to do: We need to run the Mandelbrot calculation in a secondary thread of execution and not block the UI thread. Fortunately, the F# language has tools to do this in a relatively easy way, and these tools in fact inspired the async and await keywords in C#.
Generally code that needs to run in a second thread of execution is isolated in its own function. The async keyword is used to define a block that contains the code in that function. To identify such a function, by convention the word Async is appended to the function name.
The body of the following CalculateAsync function was simply lifted from the OnCalculateButtonClicked function in the previous program:
let CalculateAsync() =
async {
let stream = Bmp.Create rows cols (fun row col ->
let x = ColToX col
let y = RowToY row
let c = Complex(x, y)
if IsMandelbrot c 100 then Color.Black else Color.White
)
return stream
}
The async block requires an explicit return statement. This function actually returns a generic object, Async<Stream>.
The CalculateAsync function will not run in a second thread by itself. There are a couple ways to do that but the approach I like is with a call to Async.StartChild with that CalculateAsync function:
Async.StartChild(CalculateAsync())
The StartChild function with this argument returns an Async<Async<Stream>> object, and the Stream must be extracted from that. This is done in two steps, and in both cases you need let! operators, called "let bang." These do not block the UI thread but instead allow the operation to run in the background. The first one sets token to an Async<Stream> object, and the second one gets the Stream object from that:
let! token = Async.StartChild(CalculateAsync())
let! stream = token
The presence of these let! operators requires another async block, so the entire Clicked handler goes in that block, and the block needs to be piped into the Async.StartImmediate function to run in the current thread. Here's the complete listing:
namespace TryFSharp
open System
open System.Numerics
open Xamarin.Forms
open Xamarin.Forms.Xaml
open Demo.Numerics
type TryFSharpPage() =
inherit ContentPage()
let _ = base.LoadFromXaml(typeof<TryFSharpPage>)
let image = base.FindByName<Image>("image")
let rows = 1000
let cols = 1000
let center = Complex(-0.75, 0.0)
let width = 2.5
let height = 2.5
let ColToX col = center.Real - width / 2.0 +
float(col) * width / float(cols)
let RowToY row = center.Imaginary - height / 2.0 +
float(row) * height / float(rows)
let IsMandelbrot c iterations =
let mutable z = new Complex()
let mutable rep = 0
while rep < iterations && z.Magnitude < 2.0 do
z <- z * z + c
rep <- rep + 1
rep = iterations
let CalculateAsync() =
async {
let stream = Bmp.Create rows cols (fun row col ->
let x = ColToX col
let y = RowToY row
let c = Complex(x, y)
if IsMandelbrot c 100 then Color.Black else Color.White
)
return stream
}
member this.OnCalculateButtonClicked(sender : Object, args : EventArgs) =
async {
let button = sender :?> Button
do button.IsEnabled <- false
let! token = Async.StartChild(CalculateAsync())
let! stream = token
do image.Source <- ImageSource.FromStream(fun _ -> stream)
do button.IsEnabled <- true
} |> Async.StartImmediate
type App() =
inherit Application(MainPage = TryFSharpPage())
And now the Button is properly disabled and re-enabled while the calculation runs in a secondary thread. This version of the program has a directory name of TryFSharpAsync.
Showing Progress
Of course, with every feature we add, the need for another feature becomes apparent. What we need now is a progress bar, and fortunately, Xamarin.Forms has a progress bar which we can add to the XAML file right under the Image:
<ProgressBar x:Name="progressBar" />
The code-behind file requires another FindByName call:
let progressBar = base.FindByName<ProgressBar>("progressBar")
Now we need to set the Progress property of this ProgressBar while the asynchronous operation is in progress. The more structured way of doing this is to pass a function argument to the asynchronous method and update the ProgressBar from that function. But it's also possible to stick the update code right in the CalculateAsync method as the first line of the setPixel function argument to Bmp.Create:
do progressBar.Progress <- float row / float rows
But this is a problem because the CalculateAsync function is running in a second thread of execution, and iOS, Android, and Windows Phone all prohibit accessing UI objects from a non-UI thread.
The easiest fix is the Xamarin.Forms Device.BeginInvokeOnMainThread method, whose argument is a function and which marshalls the execution of that function back to the UI thread:
Device.BeginInvokeOnMainThread(fun _ ->
do progressBar.Progress <- float row / float rows)
However, if you try this you'll find that it slows down the calculation of the bitmap pixels quite severely, and it's easy to understand why: The Device.BeginInvokeOnMainMain method is marshalling back to the UI thread a million times while the bitmap is being created.
The solution is to avoid updating the ProgressBar a million times. Updating just a thousand times is more than adequate.
My first thought was that this would be a perfect job for an F# partial function application. If a function has two or more parameters, you can separate the function call based on those parameters, so the function passed to the Bmp.Create method can have just the row argument and the col argument effectively becomes another function. Syntactically, it looks like this:
let stream = Bmp.Create rows cols (fun row ->
Device.BeginInvokeOnMainThread(fun _ ->
do progressBar.Progress <- float row / float rows)
(fun col ->
This looked to me to be analogous to two nested for loops, so the ProgressBar would only be set when the row changed, and that would be a thousand times rather than a million.
However, when I tried this I received an important lesson about how partial function applications work. It's really only syntactic sugar, and the real body of the function still includes the code that sets the Progress property. The ProgessBar is still being set a million times.
I solved the program instead with an old-fashioned if statement to update it only 100 times during the million operations, and to set the ProgessBar back to zero when it's complete. Here's the new CalculateAsync function:
let CalculateAsync() =
async {
let stream = Bmp.Create rows cols (fun row col ->
if (col = 0 && float row % float (rows / 100) = 0.0) then
Device.BeginInvokeOnMainThread(fun _ ->
do progressBar.Progress <- float row / float rows)
let x = ColToX col
let y = RowToY row
let c = Complex(x, y)
if IsMandelbrot c 100 then Color.Black else Color.White
)
Device.BeginInvokeOnMainThread(fun _ ->
do progressBar.Progress <- 0.0)
return stream
}
Now we have a ProgressBar that isn't crippling performance. This version of the program has a directory name of TryFSharpProgress.
Making it Recursive
By default, values in F# are immutable. That's why they're not called "variables." A let statement binds a name with a value, and by default that value never changes. Immutability tends to help compilers optimize code, avoids problems with asynchronous operations, and assists programmers in not making bugs.
Yet, the ability to change the values of variables seems so intrinsic to programming that removing the mutable keyword from the IsMandelbrot function at first seems impossible.
let IsMandelbrot c iterations =
let mutable z = new Complex()
let mutable rep = 0
while rep < iterations && z.Magnitude < 2.0 do
z <- z * z + c
rep <- rep + 1
rep = iterations
The solution is to make the function recursive, and that often requires some practice. Usually it's convenient to nest a recursive function definition (which requires the rec keyword) in a non-recursive function which then calls the recursive function. Here's a recursive version of the IsMandelbrot function. It has the same arguments as the original, but begins with the definition of a recursive function named RecursiveMandelbrot. Apart from the definition of RecursiveMandelbrot, the IsMandelbrot function really has only just statement: a call to RecursiveMandelbrot with a complex value of 0 and the iterations argument:
let IsMandelbrot c iterations =
let rec RecursiveMandelbrot (z : Complex) countdown =
if countdown = 0 then
true
elif z.Magnitude >= 2.0 then
false
else
RecursiveMandelbrot (z * z + c) (countdown - 1)
RecursiveMandelbrot (Complex()) iterations
The RecursiveMandelbrot function returns true if it's been executed iterations times, or false if the magnitude is 2.0 or above, or it returns itself with the next value in the series, and with a decremented countdown value. The IsMandelbrot function returns the final result of the initial call to RecursiveMandelbrot.
Because RecursiveMandelbrot calls itself right at the end — and because it doesn't need to retain anything from this call — this qualifies as a "tail end" call, meaning that nothing needs to be retained on the stack, and you won't run out of memory even if the countdown argument is very large.
This version of the program has a directory name of TryFSharpRecursion.
Adding Color
Very often, Mandelbrot displays are in color. Points that are members of the Mandelbrot Set are still colored black, but other points are assigned a color based on how many iterations are required before the magnitude gets to 2.0 or above.
Let's change the IsMandelbrot function to a MandelbrotIndex function. The function returns –1 for members of the Mandelbrot Set and an integer otherwise:
let MandelbrotIndex c iterations =
let rec RecursiveMandelbrot (z : Complex) countdown =
if countdown = 0 then
-1
elif z.Magnitude >= 2.0 then
iterations - countdown
else
RecursiveMandelbrot (z * z + c) (countdown - 1)
RecursiveMandelbrot (Complex()) iterations
The CalculateAsync function now calls MandelbrotIndex and uses a match statement to return Color.Black if the index is –1 and a Color value from Color.FromHsla otherwise. This function takes hue, saturation, luminosity, and alpha values, and it's easy to create fully-saturated colors with hues based on the index:
let index = MandelbrotIndex c 100
match index with
| -1 -> Color.Black
| _ -> Color.FromHsla(float index / 64.0 % 1.0, 1.0, 0.5)
And here's how the display now looks:
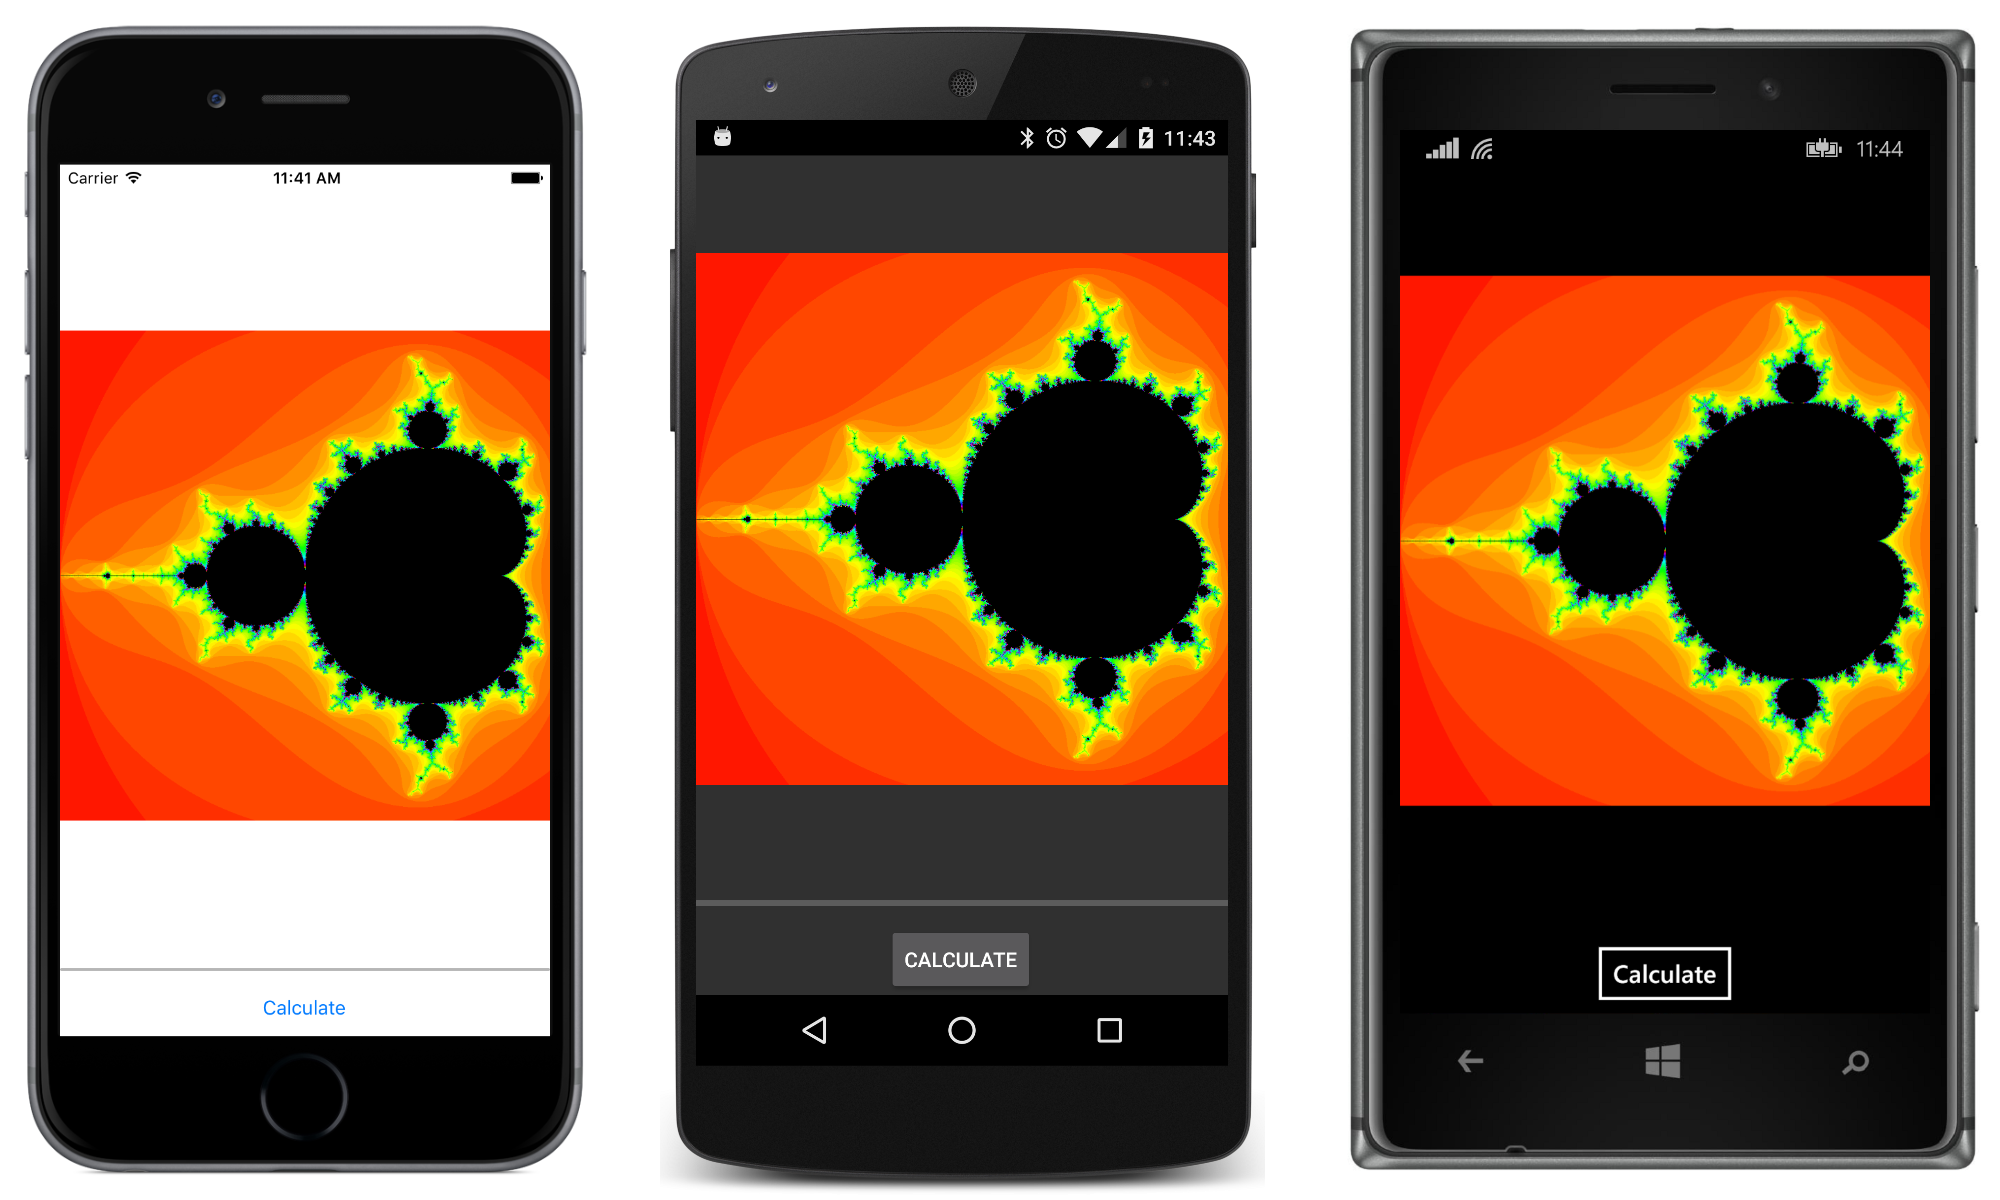
This version of the program has a directory name of TryFSharpColors.
Now we're ready to add an enhanced interface that lets us zoom in on particular locations.
But that's a job for another day.